Can Digital images taken by e.g. Blackberry camera or canon scanner be converted to PDF?
Many people always think about converting digital photos taken by their digital cameras, even mobile photo such as blackberry, Nokia to professional PDF files. How to switch those high quality digital photos with important information from their blackberry camera to PDF files will be their awful tangle. While, if people exactly right have a canon scanner, HP or anyone else, maybe they also need the below tool which also can convert scanned images into PDFs.
Now let’s track the abilities of Boxoft Scan to PDF:
- A: Convert photos come from digital camera such as Sony, Canon, etc; Blackberry, Nokia, etc; Canon, HP, etc scanner to PDF files;
- B: Set the output PDF quality, size, page location, margin, orientation, layout, etc;
- C: Sort image pages or remove;
- D: Rotate page, control output page effect, Set DPI, compress images;
- E: Set output PDF security, basic properties, and viewer;
- F: Print watermark for PDF;
- G: Set the properties of scanner;
- H: Enable users email or upload the out PDF with FTP to server(
 )
.
)
.
Well more details follow steps below:
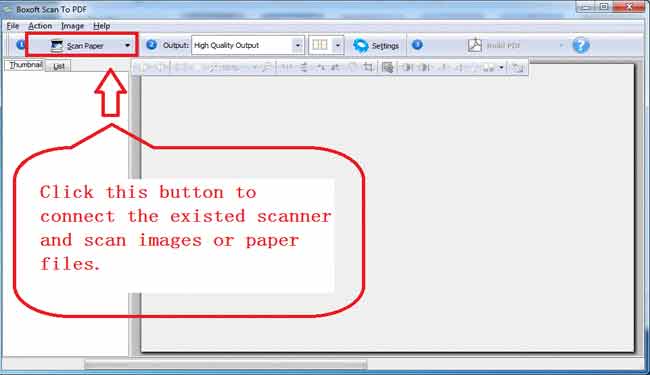
1 Click "File-->Add Images" or Click button “Scan Paper” to connect user’s Canon scanner to start scanning paper files into digital image. Then the digital images will be listed in the left “Thumbnail” box.
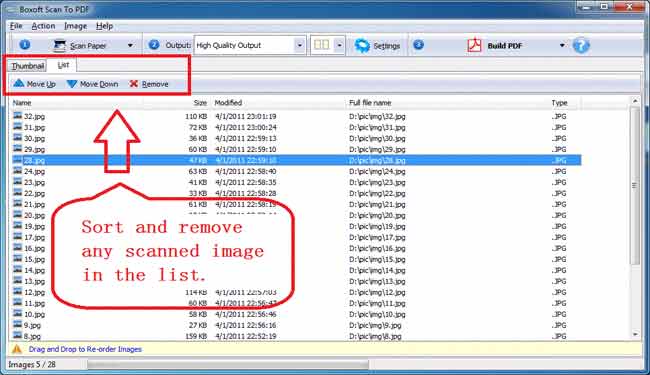
2 Select an image and then click button “Move Up”, “Move Down” or “Delete” to sort the order of images or delete it;
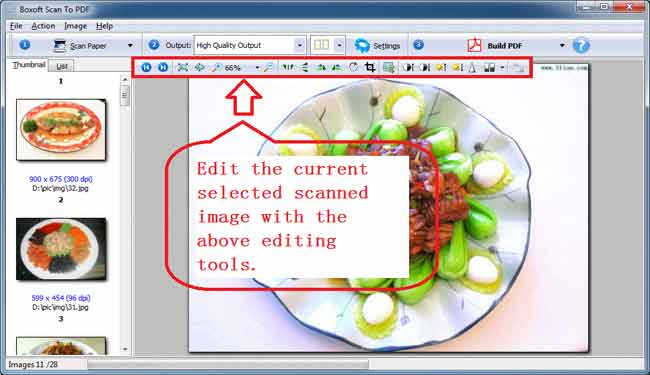
3 On the left “Thumbnail” list, click one to the right preview area to begin editing the selected image scanned by Canon scanner with the bar of editing tools.
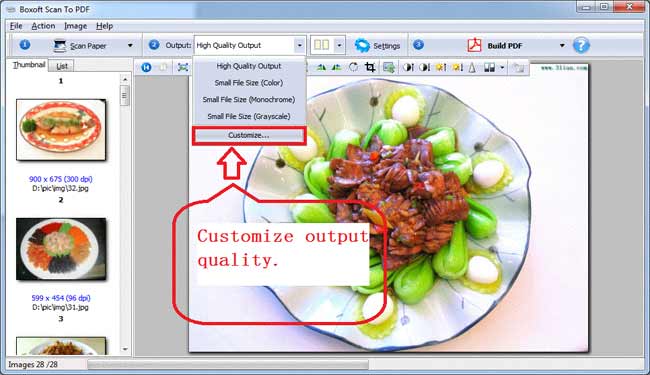
4 After scanned by canon, user hopes customize the quality of PDF. Boxoft Scan to PDF enables people customize the PDF output quality by selecting “OutputCustmoize…”.
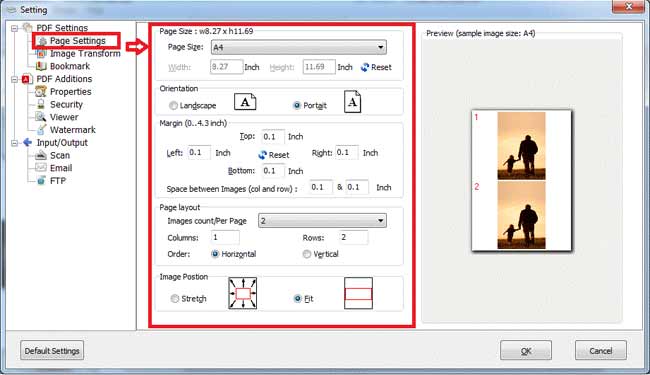
<1> After clicked button “Customize…” people enter this setting dialog box. They could self define their own need quality by setting “Page size”, “Orientation”, “Margin”, “Space between images”, “Page layout”, “image position”, etc.
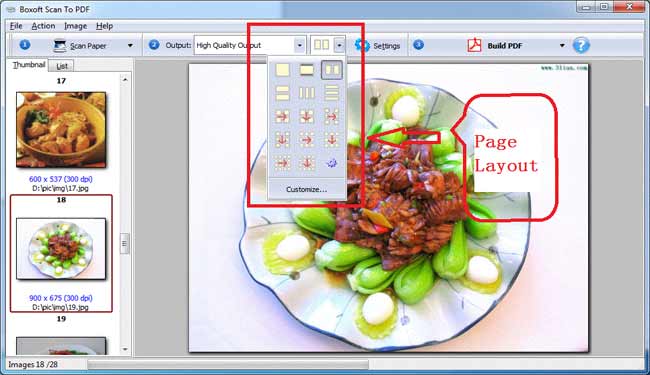
<2>Set the PDF layout: one page have one image, one page have two images, etc. This scan to PDF converter allows users customize the layout base on diverse needs.
5 Click the button on top menu line “Settings” to complete necessary settings.
<1> PDF Additions
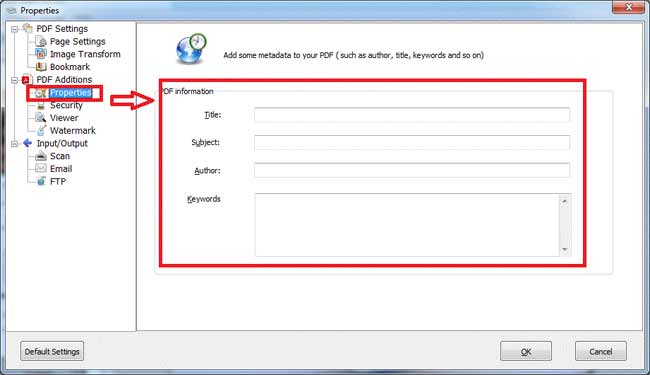
Enter the basic information about the output PDF file contains “Title”, “Subject”, “Author” and “Keywords”. This information will be in the properties of the output PDF.
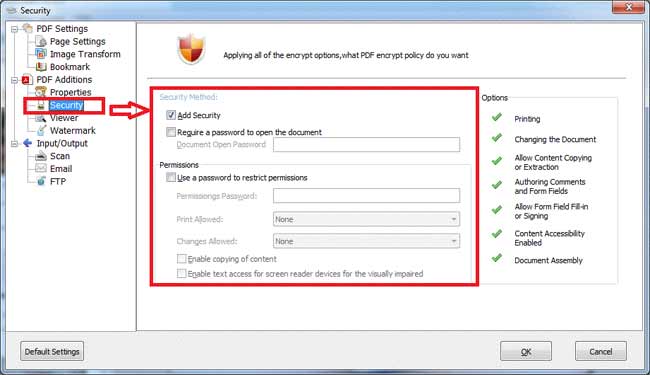
 <2>PDF Security
This tool enables users to use passwords to open the PDF document or restrict permissions.
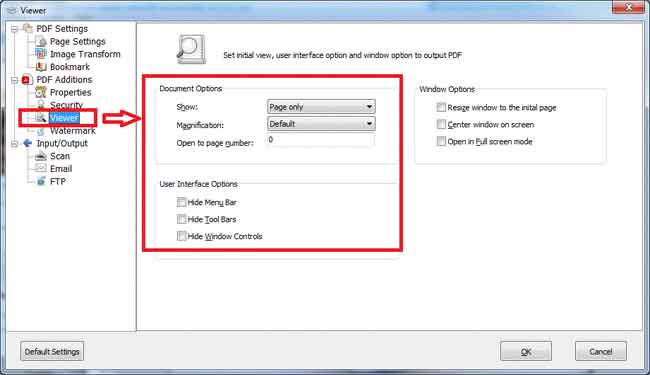
 <3> Document option contains: “Show”, “Magnification” and “Open the page number”.
Show: “Page only”, “Show the thumbnail Panel”, “Show the bookmark Panel”;
Magnification: Default, Fit Page, Fit width, 1600%, 800%……25%;
Open the page number: any number in the page arrange of PDF.
User interface Options
Checkboxes: “Hide menu bar”, “Hide tool bars” and “Hide Window Controls”.
Window options:”Resize window to the initial page”, “Center window in screen”, "Open in full screen Mode”.
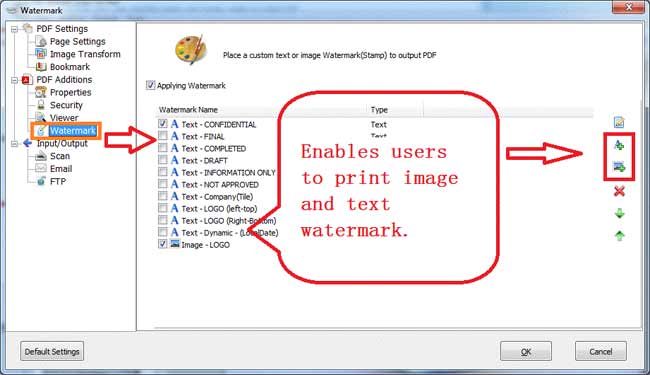
 <4>Boxoft scan to PDF enables users to print text and image watermark on PDF file. People can set the font, size, angle, margin, location of text or image watermark on any placement of the output PDF file.
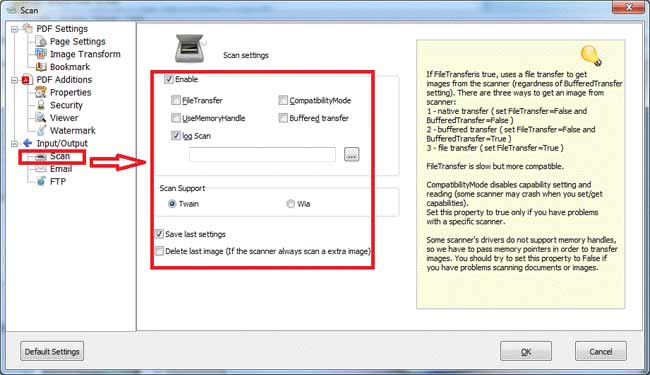
 <5>set the properties of canon or other scanner people owned. Click left option “Scan”. All setting options come up on right panel, check what you need.
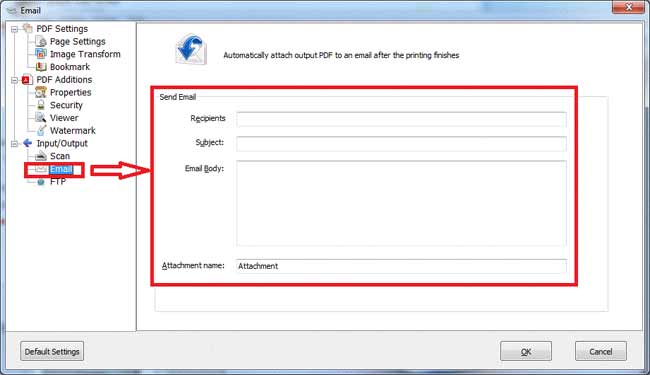
 <6> Set email settings to enables this tool help users to email the output PDF automatically. Enter “Recipients”, “Subject”, “Email body” and “Attachment name”.
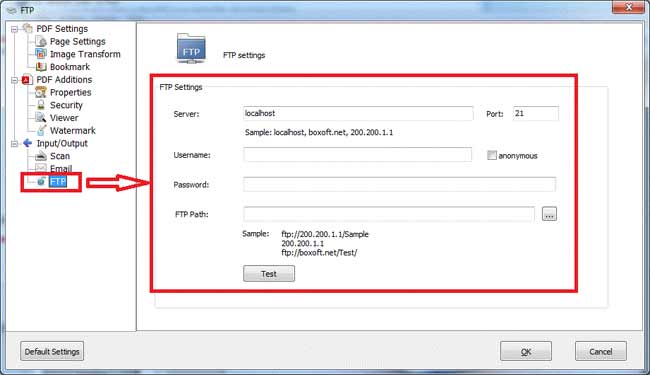
 <7> If people want to ftp the PDF files, they should first set its properties: Server name, port, username, password, ftp path, etc.
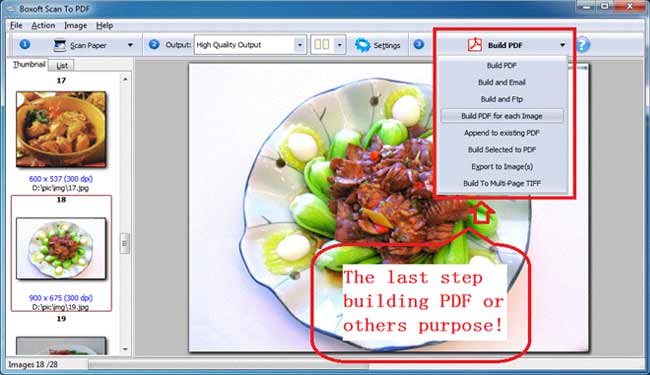
6 Finally choose one output form from “Build PDF”, “Build and Email”, “Build and Ftp”, “Build PDF for each image”, “Append to existing PDF”, “Build Selected to PDF”, “Export to Image(s)” and “Build to Multi-page to TIFF”.
- Related products
- Boxoft PDF to Word - freeware for converting PDF to word
- Boxoft PDF To JPG Converter (freeware) - Free PDF To JPG Converter - PDF To JPEG Freeware
- Boxoft PDF to DOC Converter - The easiest and cheapest solution to edit and reuse PDF contents


